Setting Up Your Accu-Chek Guide Blood Glucose Meter Is Easy
Setting up your Accu-Chek Guide blood glucose meter is easier than ever. Now, if you’re worried about learning the steps involved, don’t be. The first thing to do is to make sure that you have everything you need to start testing. You should have the following items: An Accu-Chek Guide meter, a container of Accu-Chek Guide test strips, an Accu-Chek FastClix lancing divide, and an Accu-Chek FastClix lancet drum. If you can’t find something, or if you need assistance with any of the steps that follow, just contact Accu-Chek customer service.
Next, let’s walk through setting up and using the Accu-Chek FastClix lancing device. With this lancing device, there are no individual lancets to handle or dispose of, making it much easier to use. First, you will need to load your lancing device. For this, you will need an Accu-Chek FastClix lancet drum. Each drum contains six preloaded lancets, so when you load one drum, you’re actually loading six lancets. Remove the cap from the lancing device. Now, insert a new lancet drum white end first. Push it all the way in. It should fit snugly into place.
This part is important. Do not remove the drum until you’ve used all six lancets. Once you remove it, you cannot put it back in. A drum that has been removed will have a visible red line on the side, as shown here. Now, place the cap back on the lancing device. The next step is to set the penetration depth to match your individual skin type. By turning the dial on the cap, you cal select the depth of the lancet. Set the dial to two to begin with. You may need to adjust the setting a couple of times until you find the right level for your skin type.
The Accu-Chek FastClix lancing device has one-click action. To use it, simply press the release button all the way down, like so. This will lance your finger. After each test, you will need to advance to a fresh lancet. To advance to a new lancet, simply push the white lever back and forth once. The new lancet is now ready to use. You’ll notice that the number in the window has decreased by one. This tells you the number of lancets that you have remaining. When the number shown is one, you’re using the last lancet. After using it, you need to change the lancet drum.
Now you’re ready to do a test. First, you’ll need to choose a finger to take a sample from. It’s best to alternate between fingers, as they can become sensitive over time. Remember to always wash your hands with warm, soapy water and dry them thoroughly. Take a test strip from the spill-resistant test strip vial and always remember to close the lid tightly. This helps protect the remaining strips. Insert a fresh test strip, metallic end first, into the meter, and the meter will turn on. Notice that the test strip port light allows for easier use in darker environments.
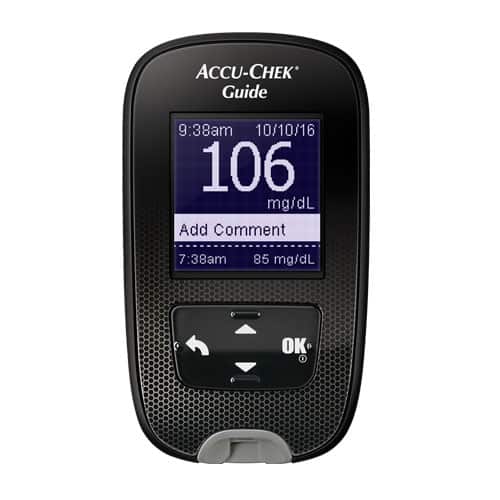
Now, it’s time to use the lancing device. Place the pinhole opening firmly against your finger and press the release button all the way down. This will lance your finger. Massage the finger in the direction of the fingertip to help the blood drop form. Touch the yellow edge of the test strip to the blood drop. When enough blood has filled the strip, “Analyzing” appears on the display. Remove your finger from the strip. A small hourglass symbol will rotate on the screen to show you that the meter is working. Your blood sugar reading will be ready in less than four seconds. It’s just that easy, and now you have your test result. The meter automatically displays your previous result too, so you can compare blood glucose levels. This feature may be turned on in the settings menu.
Two important final steps. First, dispose of the used test strip by pressing the strip ejector button on the right side of the Accu-Chek Guide meter. Then, advance to a fresh lancet by simply pushing the white lever back and forth once. A new lancet is now ready to use the next time you lance your finger, and you can put everything in the carry case.
The user guide is available for download on this page if you have any further questions and thanks again for choosing the Accu-Chek Guide blood glucose monitoring system.


